Wednesday, July 28, 2021

How Celery Juice Can Reduce Acne

Have you tried every trick in the book but still suffer from acne? Although there is no single solution to this widespread problem, there are small things you can change in your daily life that will gradually clear up your skin.

Celery juice has been used as one of the infamous acne hacks and has recently gained popularity. However, the notion that celery juice is responsible for clearing acne has been debated by researchers.

So, is celery juice good for acne? Let’s first understand what acne is.


What should you know?


How Celery Juice Can Reduce Acne


On the surface, acne is classified as blemishes on the skin, which usually appear on the face and neck. The skin has pores that are connected to oil glands that produce sebum, an oily liquid. This liquid is responsible for removing dead skin by transporting them to the surface through follicles.

Acne is essentially caused by bacteria called streptococcus bacteria, which can be found in the liver. It travels up to the skin when the lymphatic system and liver are weakened. Excess sebum oil is therefore produced as a reaction to the streptococcus bacteria, and this results in acne.

The problem of acne appears when the pores in the skin are clogged with excess oil from the glands as well as dead skin cells. These clogged pores give rise to three types of acne:

  • Whitehead: This type of acne occurs when the clogged pore closes and protrudes out of the skin. They appear as whitish bumps on your face.
  • Blackhead: This type of acne is a clogged pore that stays open and appears as a tiny dark spot on your skin.
  • Pimple: This type of acne is caused by open-pore walls that allow bacteria, oil, and dead skin cells to enter the surface of the skin. They have an appearance of red bumps that are sometimes accompanied by a white top that is filled with pus.


Does celery juice affect acne?

Although there have been many claims of celery juice curing acne, there is no substantial scientific evidence to back these claims. However, celery offers numerous health benefits that could potentially reduce inflammation that causes acne.

Even though celery is not directly related to reducing acne, it could have a positive impact on your skin. Let’s look at some of the benefits of celery for your skin.

Improves immunity

Celery juice contains sodium cluster salts that fight against the acne-causing streptococcus bacteria in the liver, and therefore, this directly affects the appearance of your skin.

Additionally, celery juice is responsible for strengthening the liver, thereby preventing the streptococcus bacteria from nesting in it. This, in turn, improves your immune system, which can effectively fight against the streptococcus bacteria from attacking the lymphatic system.

Anti-inflammatory

Celery has an abundance of minerals, antioxidants, and vitamins that can lower inflammation on your skin. Since anti-inflammatory foods can potentially lower oxidative stress and reduce levels of hormones that contribute to acne, such as the growth factor-1, which is an insulin-like hormone.

Low sugar

Celery juice does not have as much sugar as beverages such as soda, energy drinks, coffee, and others. Since research studies have revealed that diets rich in sugar lead to increased acne, switching to a low glycemic diet can reduce it. This type of diet indicates that you should include food that does not increase your blood sugar rapidly, into your diet. One of the measures towards this diet would be to switch sugary beverages to celery juice.

Hydration

Celery juice is comprised mainly of water, which keeps your skin hydrated. This is essential to avoid acne as it maintains the hydration levels in the skin cells. Dehydrated skin is prone to looking dull and wrinkly. This can be avoided by including celery juice in your daily diet, which will enhance your skin’s health.

Nutritious

Celery juice contains numerous nutrients that can be utilized by your skin. The hydrating factor of celery juice allows the skin to flush out waste products from the body, thereby clearing dirt from the skin as well. Celery juice is packed with nutrients such as zinc, fiber, vitamins A, B, and K, and magnesium. These are specifically linked with the health of your skin, and the antioxidants allow faster rejuvenation.

Antioxidant

The antioxidant polyphenols present in celery juice effectively remove toxins from your system as they combat the reactive oxygen present in your bloodstream. The abundance of magnesium and potassium present in celery juice is responsible for maintaining the pH and electrolyte balance of your skin.

These properties of the juice can sufficiently fight acne on your skin. Additionally, Vitamins A and C, as well as the folate present in celery juice, prevent infections inflammation on the skin.


Why does the celery have to be juiced?


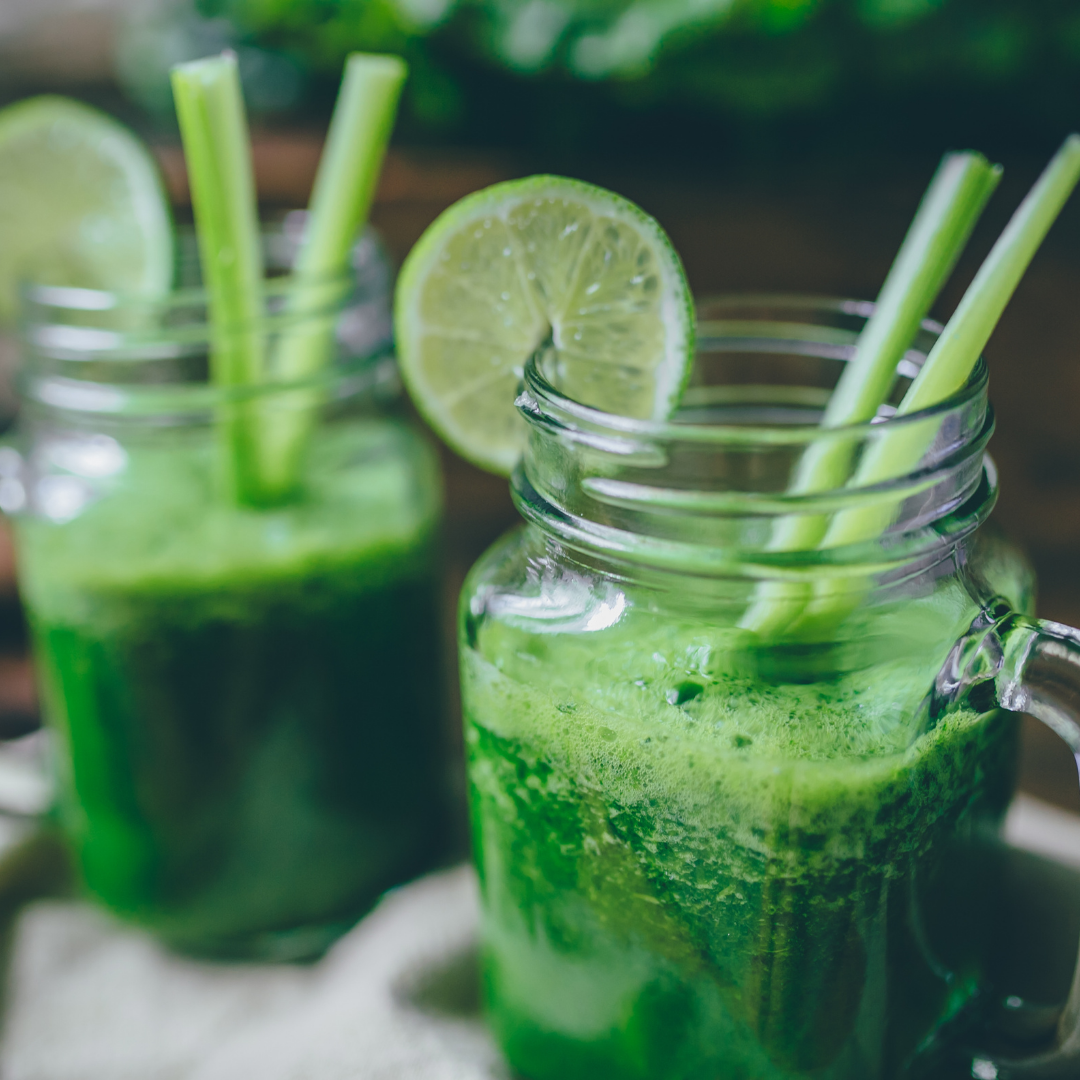
green juice 769129 1280


You might bail on your daily dose of celery juice to help your skin because it is tedious to make. However, juicing the celery causes the removal of the pulp, which is required to reap the healing benefits of celery.

Eating celery is a good addition to your diet, but it does not provide all the health benefits offered by celery juice. Juicing celery allows access to its concentrated cluster salts, which provide a plethora of health benefits. Some of these include the removal of toxins and strengthening your liver. These aspects are essential for your skin and will be beneficial for reducing acne.

Many people are unaware of the ingredients required to make celery juice that is beneficial for their skin. Let’s take a look at every element required to make the perfect celery juice that will improve the health of your skin.


How to make celery juice?
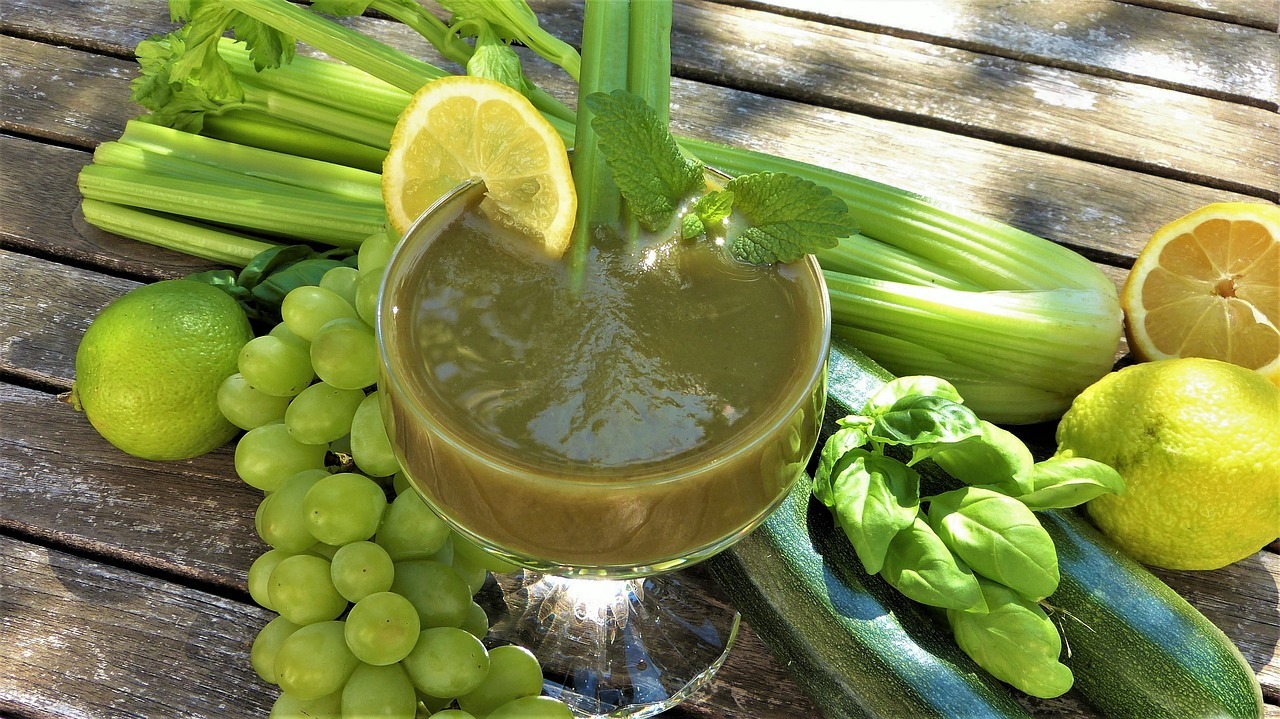
 

smoothie 2303616 1280


Making celery juice does not require extensive effort as it can be made from ingredients lying around the house. Following the given steps will give you the most balanced celery juice required to reduce acne.

  • You will not need more than 3 or 4 stalks of celery. Wash these with running water and remove any additional leaves that will increase the bitterness of the juice.
  • Chop the stalks of celery into tiny pieces.
  • Add these tiny pieces of celery to a blender along with three tablespoons of water and blend until the texture is smooth. Using the high-speed on your blender is recommended.
  • Pour this smooth mixture into a strainer placed over a glass, and squeeze out as much of the liquid as you can.
  • Ensure that you drink the celery juice immediately to avoid loss of nutrients.
  • The drink can be embellished with ginger, green apple, or lemon juice to increase its nutritional value.

While some grocery stores offer readymade celery juice, it is always preferred to make it fresh and consume. However, if you are in a hurry and do not have the time to make yourself celery juice, ensure that the packaged one is free of sugar.

Drinking 16 ounces of celery juice every day is ideal for receiving all its health benefits. This habit will not only cleanse your entire system, but it will also clear up your skin, reducing acne.

The best time of the day to drink your cup of celery juice is in the morning. Drinking the juice on an empty stomach will allow you to optimize the benefits it offers. However, if this is not possible, ensure that your drink the juice 30 to 60 minutes after a light meal. A heavy meal warrants waiting at least 2 hours before consuming the celery juice.


What are the possible side-effects of drinking celery juice?

The macronutrients present in celery juice can also have negative effects. The phytochemical composition in celery juice can cause some side-effects.

  • Photosensitizing properties of celery may lead to skin rashes. This is due to the active psoralens in the juice that can trigger phototoxicity.
  • Excess of celery juice can have adverse effects on your kidneys. It contains oxalate molecules that may interact with calcium ions present in your body and possibly give rise to stones.
  • The calcium oxalate deposits formed as a result of excess celery juice in the body can hinder the functioning of the kidneys. This results in calcification, which can trigger inflammation.

Avoiding these side-effects can be done by consulting healthcare professionals that can point you in the right direction. It is recommended that your intake of nutrients should be a variety of vegetables, consumed as a whole. However, celery juice is more beneficial for your skin as well as a welcome change from eating raw vegetables.


To sum up

Although scarce research studies have been conducted on the effect of celery on acne, celery juice contains many nutrients that are extremely beneficial for your health. This includes your skin, and it will probably an impact on the reduction of acne.

You cannot go wrong by drinking celery juice every day due to the many benefits it offers. Not only does it improve the health of your skin, but celery juice is also known for bettering your hair and nails. If one of these benefits is the reduction of acne, it is worth a shot!


https://brazenkitchen.com/how-celery-juice-can-reduce-acne/

Friday, July 23, 2021

Vitamix 5200 Vs. Vitamix 7500: Which One is Better and Why?

The Vitamix blenders are known for their supreme performance. They are well-reputed for launching high-quality blenders with unsurpassed efficiency. However, the scenario can get a little troublesome when it comes to choosing between some of their top products.

Such two blenders are Vitamix 5200 and 7500. Even highly experienced professionals can find it hard to reach a decision. The confusion arises because both these blenders look kind of identical. You know what they say: Looks can be deceiving!

So, there are plenty of differences between Vitamix 5200 and 7500. Keep reading to know in detail about Vitamix 5200 Vs. Vitamix 7500

What Are Vitamix 5200 and Vitamix 7500?

Vitamix is one of the leading brands to consider while buying blenders. They have been producing top-notch blenders since 1932. Even after 80 years, they are still the highest selling blender brand with Vitamix 5200.

They have introduced a series of new generation blenders to be done with some shortcomings of the last one. The 7500 model is one of the newest blenders launched by Vitamix. It is quickly gaining popularity due to its high-quality features and convenient usability.

A new generation comes packed with a new set of upgrades and features. However, is that enough to beat the age-old favorite product?

Both 5200 and 7500 have been competing for the top spot. However, it can be a tough call for many while deciding which one is better and why. So, let’s discuss in detail about the battle between Vitamix 5200 Vs. Vitamix 7500.

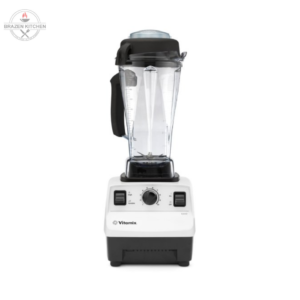
Vitamix 5200


Vitamix 5200 Vs. Vitamix 7500


Vitamix 5200 is one of the first generation blenders of Vitamix. Besides being simple and basic, this model also has some intuitive controls. This makes it extremely convenient for everyday use.

If the motor happens to overwork itself, then it will shut down automatically to prevent any damage. This feature is known as an overload-shutoff safety function. Featured with a self-cleaning function, Vitamix 5200 just keeps getting better.

It also includes a dial that allows you to monitor the ten-speed settings of the motor. You will find a mode switch to choose between the High and Variable settings.

One thing to keep in mind is that this blender might be too tall and big for low cupboards. Also, the accessories and the container are not safe to wash in the dishwasher. So, this is a drawback of the Vitamix 5200.

Another disadvantage is that the 5200 model can create a lot of noise while blending. A super loud blender is not something a lot of people would like.


Vitamix 7500


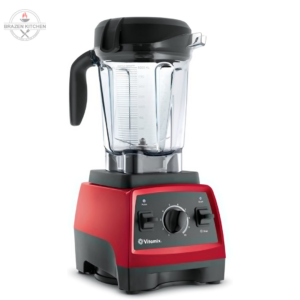
Vitamix 7500


Vitamix tries its best to keep improving and upgrading its products, and the 7500 model is proof of the same. It is quite popular with customers owing to its powerful motor that increases its overall performance level.

The Vitamix 7500 features a 2.2HP motor, which is the most powerful Vitamix has done so far. The pulse feature can make anything for you in a jiffy. Hot soups, frozen desserts, dough, flours, guacamole, and so on, name it, and you got it.

Just like other models from Vitamix, you can expect durability and longevity from this one as well. This is one of the next generation blenders of Vitamix. One of the many plus points of this blender is that it is significantly quieter than others.

The pitcher of the 7500 model is comparatively shorter, so it will fit almost every cabinet. Even better, the pitcher has a wider base, which makes cleanup easier. The wider base also makes it more stable.


Vitamix 5200 Vs. 7500: A Detailed Comparison

The Vitamix 7500 is a more modern model when compared to 5200. But, some users find it a bit too expensive. On the other hand, some are dissatisfied with the performance delivered by Vitamix 5200.

Overall, these two are currently two of the best Vitamix blenders available in the market. So, rest assured that you will receive quality performance with both. Both these blenders share some similarities and also differ in certain aspects. To make the right decision, you must go through them thoroughly:


1.     Motor


Motor


A motor, here, refers to the engine that runs the bender. So, yes, it is an important element of the blender. Without a motor, your blender wouldn’t serve the purpose it was bought for.

The Vitamix 5200 has been in use for a long time. It has a peak 2.0 HP motor that is good enough to chop through anything. So, the blender will do its job well enough.

However, there is an issue with the motor. It heats up when run for longer blends. Also, it would bind for a few seconds while blending dry ingredients.

The 5200 motor is pretty noisy too. So, Vitamix decided to resolve the issue, and with the new generation models, they decided to increase the motor output to 2.2 HP, now that is a 10% increase. To deal with the overheating problem, they added cooling fans as well.

As less as it may sound, these changes worked wonders. The cooling fan allowed the motor to run for a longer duration without getting heated up. The higher horsepower makes the blender even more powerful.

So, if you need your blender to cut through harder ingredients like nuts and run longer, then 7500 is a better option.


2.     Blade Size

Both Vitamix 5200 and 7500 have high-quality stainless steel blades. These blades are made of aircraft-grade stainless steel. Both are laser cut and look almost identical.

These blades are the very best you can expect from a blender. They won’t rust or corrode for the entire lifetime of the blender. So, you won’t need to spend extra money on replacement.

It is noteworthy to point out that the 5200 model has a comparatively shorter blade. These blades are 3 inches long. Another difference is that these lie at a higher angle because the 5200 model has a smaller width.

With the 7500 model, you get a wider pitcher, and so you also receive an extra inch of the blade. The 4-inch blades predictably sit comfortably at a lower height. As a result, such placement gives better blending and chopping power. When you combine these blade features with a very powerful motor, you get the perfect blender.


3.     Pitcher Size

The first thing a customer will notice is the different sizes of the pitchers of the two models. The Vitamix 5200 has a taller and narrower pitcher. It’s so tall that when attached to the base with its lid, it measures 20.5 inches tall.

You wouldn’t be able to keep it in a cabinet. This is what most people complained about the 5200 C series. Storage was a really major issue as a big blender can’t be placed on shelves. A lot of customers couldn’t store the 5200 model under the cabinet.

The 7500 model has a wider and relatively shorter pitcher. So, the storage issue is resolved with this one. It will fit most cabinets, and the wider base will add more stability to the blender.

The 7500 one stands at 17.25 inches tall when assembled. The height was an issue many complained about, but the 7500 series resolves it. A key takeaway from this is that Vitamix does listen to complaints and takes actions too.

However, both the pitchers are of the same size, i.e., 64-ounces. Also, both the containers are made of BPA free and shatterproof plastic. Note that the 7500 model is compatible with other containers as well. So, you got a lot of perks with the 7500.


4.     Controls


blender controls 1


The control knobs and other toggles of the two blenders are more or less the same. As a matter of fact, you won’t be able to find much difference between the two.

For the Vitamix 5200 model, the right toggle is the On-Off switch. It can hold two positions and supply power into the motor. It stays in a position until you flick it to switch to the other one.

The middle dial on the 5200 model is a ten setting turn dial. This will help you adjust the speed of the motor and also the blades. One is the lowest setting, and ten is the highest. You need to have the leftmost toggle in the up position (On state) to use the dial.

Lastly, the leftmost toggle is a type of spring toggle. It stays in the “up” position for the time you hold it in that position. This toggle can override the speed dial and drives the motor into a higher speed.

The left toggle is used when you are blending at a low speed but need high power for a bit. So, you won’t need to adjust the dial for a few seconds. You just need to press the switch, and the motor will be put into high speed.

The Vitamix 7500 is not the same; it’s slightly different from the 5200 toggles. People had a big complaint about the 5200 model having no pulse action. Now, pulsing is needed in several recipes, and a blender should have that feature.

Vitamix listened and answered with the new generation blenders. The high-speed variable toggle was removed and replaced with a new pulse toggle. The pulse toggle is a spring-loaded toggle as well, just like the high-speed toggle.

You need to hold on to the pulse to rev up the motor for that period. If you have a 5200 model and want to pulse something, then you’ll have to keep flicking the ON/OFF toggle repeatedly. This is a real pain to execute.

So, the 7500 is better in this case. You do need a pulser in the kitchen, and by all means, it is more important than the high-speed toggle.


5.     Noise

You might be wondering if you could get a blender that does not make noise at all. The chances are minimal, so you need to find a blender that makes the minimum noise.

The Vitamix 7500 model is 40% quieter than the Vitamix 5200. The 7500 model has a great advantage over the latter.

Like all other points, the noise made by the motor of 5200 was also an issue that was reported time and again. So, Vitamix took note and incorporated some noise-suppressing technology to the motor of 7500.

This ensures that the new model works perfectly with minimal noise. But, keep in mind that a quiet blender does not indicate better performance. The blending ability remains the same in both cases.


6.     Color Options

A lot of people might not bother about the color, while some might care too much. For chefs and regular home cooks, the appearance of the blender is equally important as the food quality. The color does not impact the working of the blender, but it could be asked for the customers.

The older Vitamix 5200 model provides you with 5 different color options to choose from. While the 7500 model gives you 3 color choices only.

Vitamix 5200 is available in the following colors: black, white, platinum, red, and stainless steel. On the other hand, the 7500 model offers black, white, and red only.

However, don’t lose hope yet because the 7500 is comparatively a newer model. So, maybe the manufacturer will include more color options in the future.


7.     Cleaning Convenience

Both the Vitamix models have a self-cleaning feature incorporated in them. However, this does not mean that your blender will clean itself on its own.

You need to half fill the pitcher with warm water and add some drops of dishwashing soap. Put the lid on the pitcher and run the blender on slow speed. Increase the speed gradually as the water reaches the rim and is done cleaning the pitcher walls.

This is how you clean your pitcher. Then, you need to rinse the pitcher thoroughly, and it’s done. Keep in mind that the Vitamix pitchers are not dishwasher safe. Also, it says, “self-cleaning,” but you need to manually do a lot of cleaning procedures.

A word of caution is that never put your blender’s container in the dishwasher! If you do so, then the seals will be ruined, and you’ll no longer be able to avail of the warranty.

So, the pitchers of both models need to be cleaned in the same way, and there is no difference here.


8.     Price

The price you pay for your blender depends mostly on the place you are buying it from. However, there is a certain price difference between Vitamix 5200 and 7500. It is quite obvious that the former is cheaper.

The motor of the 7500 model is much more powerful. Besides, it is a newer model packed with better technology, so obviously, it is more expensive. So, if your budget is tight, then go for the 5200 model.

The Vitamix blenders are high-quality blenders with great power. They are built in a way to be durable and long-lasting too. Also, these blenders come with a warranty of 7 years. So, every penny you spend on these blenders is worth it.


Which One Should You Buy?


select


If you have been a customer of Vitamix, you would know that this company makes some of the finest products in the market. So, regardless of your decision, you’ll still be good to go with any of these two models.

Both these models are convenient, durable, and extremely powerful. An average user will surely be satisfied with any of these.

If you look a little closer, both of these blenders do not differ that much performance-wise. The 7500 model indeed has larger blades and a better motor, but that doesn’t make a huge difference. Let’s take a look at how you’ll be benefitted with 7500:

  • A shorter container means easy storage under the cabinet.
  • Bigger blades translate to better textures and smoothness.
  • The pulse button is useful for salsa and other recipes of sauces.
  • The little noise is convenient for long-term and extended usage.

The Vitamix 7500 model addresses a lot of drawbacks of the 5200 model. For the same reason, it might seem like the better choice. However, the decision should be taken as per your needs and budget.

Besides, just because the 7500 model appeals as an overall better option doesn’t mean that 5200 is not good enough. In fact, it is better than the other blenders that come in its price range. This is the reason why this model is still in production even after 12 years.

If you need the pulse feature, storage convenience, and can’t bear noise, then the 7500 model should be your take. It is recommended to purchase it only if your budget permits so.

On the other hand, in case you don’t need a pulse button, have ample storage space, and are a bit tight on your budget, then Vitamix 5200 is a good option.


Summing Up

Everything that you need to know about Vitamix 5200 and Vitamix 7500 has been mentioned in this article. With all that information, you are surely in a better position to make a suitable decision. Hopefully, your doubts have been cleared by now. Good luck with your shopping experience!


https://brazenkitchen.com/vitamix-5200-vs-vitamix-7500/

Thursday, July 15, 2021

The Best Juicers Under $100 for 2021 (How to Buy and Reviews)


Have you been looking for an affordable juicer for all your juicing needs at home? The right juicer can give you fresh, nutritious, and delicious juices that add significantly to your overall health. For many families, juicing is the most colorful way to add to their child’s healthy lifestyle. For all the busy bees out there, juicing is the best way to give your body just the vitamins and minerals it needs.

For these reasons, affordable juicers can make your life very easy and healthy. Read ahead as we answer the questions you may have had about buying a juicer for your kitchen. We then review and outline the best juicers under $100 for your kitchen.


How to Buy a Juicer?

When you are picking a juicer for your kitchen, several questions may come to mind. We’ve answered some for you.


What Kind of Juicer Should I Buy?

When you plan on buying a juicer, you should know that there are masticating juicers and centrifugal juicers. If you are buying a centrifugal juicer, it will contain a blade that will spin very fast and separate the pulp and the juice. It is a quick way to get nutrition into your body. It is largely used for softer fruits and requires little prep. Look for a centrifugal juicer with a big chute so that you can fit in larger fruits.

If you are planning on getting a masticating juicer, know that these work slowly and preserve the pulp. You will have to cut the fruits and veggies before you add them in. They work very well with vegetables.

Depending on the kind of produce you juice most, you will have to pick between a centrifugal or masticating juicer.

What Speed Settings Should I Look for?

The best juicers under $100 will generally have a dual speed setting. A high-speed setting will let you juice harder fruits like apples and veggies like carrots. There will also be a low-speed setting that will let you juice softer fruits like oranges and plums. You may want to look for a juicer with this setting so that you can make the best of both worlds.

How Can I Ensure My Safety?

Look for juicers that come with safety settings and sensors. Most juicers won’t start until you have locked the lid well. Good juicers will also have an overload sensor that will signal the juicer to stop juicing in case of overload. You may also want to look for stainless steel and Food Grade material to make sure that no toxins enter your juice.


Reviews of the Best Juicers Under $100 for 2020

You now know just the features that you should look for in a juicer under $100. You may have also picked your top priorities.  Read ahead for our list of the 5 best juicers under $100 for 2020.


Best 5 Juicers Under $100 in Detail

Here are our detailed reviews for the best 5 juicers under $100. Read ahead as we help you make your best purchase.

1.     Hamilton Beach Juicer Machine


Best Juicers


This Hamilton Beach juicer is a product that is easy to assemble and will let you juice fruits and vegetables in seconds. It also has an extra-large pulp bin for maximum juicing capacity. Its 3-inch chute will fit in whole vegetables and fruits like an entire apple at a time. This reduces prep and cutting time and allows you to enjoy a continuous juicing experience.

Further, it is extremely easy to clean as its parts are dishwasher safe. It is a centrifugal juicer that does its best job with juicy fruits. Hence, if your family and you love juices, this is a great option for you.

Pros

  • Contains an in-built strainer with no extra parts necessary
  • Contains a 500-watt motor for fresh juice in only a few seconds
  • Comes with recipes
  • Comes with a cleaning brush for easy cleaning
  • Affordable juicer

Cons

  • Very loud
  • Excess wastage


2.     Orfeld Slow Masticating Juicer


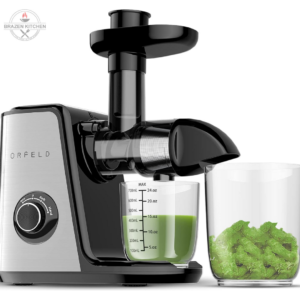
orfeld juicer 1


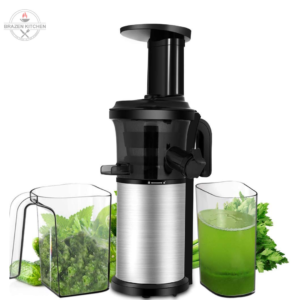
This Orfeld Masticating Juicer is a great buy if you are looking for a slow juicer that can retain nutrition and give you a high yield. This is done through the 7 segment spiral that opens up each cell in the fruit for yielding a large quantity of juice. Further, it works to minimize heat and friction, thus keeping the nutrients intact in the juice.

Hence, the juice it gives you is cold-pressed to retain vitamins and the pulp, which ensures that your blood sugar rises slowly and remains stable.

If you hate noise, this is the perfect addition to your kitchen. With a noise level of less than 60dB, it contributes to a calm and quiet home environment. It also comes with a long brush that makes cleaning extremely easy. Using this, you can reach all corners of your juicer for the ultimate cleanliness. It is also designed to accommodate various fruits.

By setting it on SOFT speed, you can juice away all your watermelon, celery, oranges, and cucumber. On the HARD speed, kale, ginger, carrots, and apples can be juiced. It is also made with food-grade materials that keep any toxic substances out of your juice.

Pros

  • Made of Stainless Steel for durable use
  • A reverse function that reduces any food residues and prevents food from getting stuck
  • Great after-sales service with a 30-day no reason return policy
  • Preserves nutrients through slow juicing
  • Features an intelligent chip which detects an overload
  • Easy to clean with safe dishwasher parts


Cons

  • Takes time to juice


3.     Aicook Juicer Machine


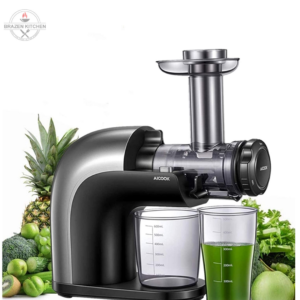
aicook juicer


This Aicook Juicer Machine is a juicer and juice extractor with a wide mouth for various fruits. Its stainless steel body makes it durable, and you and your family can continue juicing for months. The material is Food Grade for your safety. It is an extractor that is designed to extract the maximum possible nutrients from your fruits and veggies.

With three speed settings from medium to very fast, you can easily juice a variety of vegetables and fruits in one juicer. It comes with a brush with which you can easily clean out the difficult corners of your juicer. It comes with recipes and a slag bucket just for you. It is a great addition to your kitchen if you are looking for a small, durable juicer.

Pros

  • Features a safety protection mechanism that won’t let juicer work unless shut tight
  • Features an overload sensor
  • 3-year warranty period with life support
  • Centrifugal juicer for shorter prep time
  • Contains a built-in froth separator

Cons

  • Requires straining after juicing
  • Slightly difficult to clean

4.     Sagnart Juicer Machines Centrifugal Juice Extractor


sagnart juicer 1


This Juicer Machines Centrifugal Juice Extractor is made of anti-corrosion stainless steel material. This makes it both durable and safe. Further, it can extract 25% of the juice and 37% of nutrients like vitamins and minerals. These are competitive percentages, more than other juicers in the market. Hence, it is an incredibly efficient juicer.

It’s juicing mode of low speed is suitable for wheatgrass, spinach, oranges, and other softer fruits and vegetables. It also has a high-speed mode that works well with beets, carrots, celery stalks, and other harder fruits. There is also a ‘functional jog’ button that will let you get any ingredients stuck in the juice net moving again.

Pros

  • Features overload and overheat protection sensor
  • Ensures your safety by not starting unless the juicer is locked
  • Features a drip-proof design to prevent the juice from spilling
  • Comes with a fruit slag collection cup and juice cup

Cons

  • Requires 10 minutes cool-down after every 5 minutes of work

5.     Makoloce Centrifugal Juicer Machines


makoloce juicer


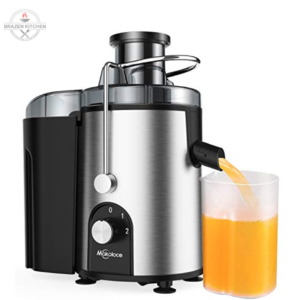
The best part about this Makoloce Centrifugal Juicer Machine is that it is designed to work at a speed of 1200 rpm with a pure copper motor. This makes it extremely efficient, and your family will get a high yield of juice. Further, made of stainless steel fine filters, it lets you get the maximum nutrients out of your juice.

It has a low-speed mode for fruits like raspberries and oranges. It also has a high-speed mode for harder fruits like plums, apricots, and apples. It has been made more versatile with a large chute that lets you push in larger fruits. This lets you juice regularly with minimal prep. It also comes with a pulp collector, a pulp container, and a cleaning brush. Further, it is an easy-to-clean juicer so that your kitchen chores are done much faster.

Pros

  • Contains a large feeding chute of 3 inches to feed whole fruits
  • Made of BPA free material
  • Comes with a 3-year warranty and lifetime support
  • Easy to assemble and dissemble

Cons

  • Is relatively heavier
  • Can take up more space


Summing It Up

When you buy a juicer for under $100, you may have had many questions about how to make the best purchase. We have answered these for you above. We understand that finding a good juicer can be difficult. Hence, we have reviewed the 5 best juicers under $100 for 2020 above. You can read our answers and use them as a guide to make your best purchase from the reviews above.


https://brazenkitchen.com/the-best-juicers-under-100-for-2021/

Monday, June 21, 2021

How Long Does Juice Last?

You would love a glass of fresh juice, won’t you? The juice is one such drink that can comply with your hunger while surpassing the nutritional value. Although you might want to choose between a glass of fresh juice or a packed, preserved one. You might know the expiry date of a packaged box of juice but a natural fresh juice goes bad soon. Fresh juice may last good for about a day or two only if refrigerated.

Vegetable juices should be consumed as soon as they are prepared to avoid their spoilage. To keep them for more than a day tries adding half a lemon as it makes up for the missing acid preservative.

Fruit juices can be stored for more than a day as fruits contain acid which lowers the pH and fructose which imparts sweetness. Citrus fruit juices are organically acidic so they don’t bother by getting spoiled easily. Let’s find out more about the shelf life of the juice.


Which fresh juices last the longest?

The most preferred fresh juices are from the citrus family; orange, sweet lime and lemon. The longevity of any juice can be gained by decreasing its pH. Luckily citrus fruits contain their citric acid that avoids the juice from getting spoiled. Other than citrus fruit juice, the apple juice also stays fresh for 2-3 days.

As for vegetable juices which are least preferred, they stay safe for 1-2 days. However, the addition of lime juice and a dash of salt will help it to last a couple of hours extra. It is best to consume the vegetable juice within 2-3 hours of its extraction. Some favoured veggie juices are tomato, bottle gourd, beetroot, bitter gourd or a mixed one having all of these.

You might want to add garlic to the mixed vegetable juice to upgrade the nutritive value and pour in some preservation.


Are packaged juices good for health?


How Long Does Juice Last


People often go for a glass of juice rather than soda or soft drinks assuming that is the healthy alternative. But they are quite under the rock, as they are of no good like the carbonated drinks. Packaged juices contain chemical preservatives to keep them safe for drinking.

Packaged juices are low on fibre content and high on the sugar (fructose) quantity. Drinking these juices every day isn’t a healthy idea. The juices go through processes like pasteurization and de oxygen. These treatments dissipate all its vitamins and decrease the quality.

Packed juices lack nutrition and show the presence of patulin registering that an inferior variety of fruits have been utilised to make them. They also contain corn syrup and artificial sweetener which is of no good use for the body. An elevated level of calories is recorded in a glass of packed juice being compared to the home-made fresh juice.

Juice manufacturing companies always showcase juices with added pulp in it. The pulp comprises of fibre, but the ingredient list mentions 0% fibre. Can drinking expired juice make you sick? This indicates it is completely off the healthy hook!


Effect on homemade juice within a day

Like we know, freshly prepared homemade juices are quite perishable so they have to be consumed in a few hours. However, if you leave it unattended for more than 24 hours, the homemade juice may turn bad.

Bacteria and oxidation are the two foes of the fresh juice. Oxidation is a result of the air, heat and light on the fresh juice to shrink its shelf life. It transforms the sweet taste to a sour one.

A fabulous tip to ward off the oxidation is the addition of citrus, which is rich in antioxidants. Moreover, a slice of orange or lemon can make up for the missing power in the juice.

Organic fruits are ideal for consumption but not everyone can obtain it. The best idea will be to buy the most pristine and high-quality products which are affordable. Fresh fruit or vegetable will provide more nutrients because as time passes by the nutrient value decreases. More freshness equals to more nutrition. But there exists an indirect variation between freshness and the rise in harmful bacteria. These bacteria induce decay in fruits and vegetables and eventually spoils them. To eliminate bad bacteria remember to thoroughly wash all the edibles.


Which juicer helps the juice to last long?

The juicer you use to make the juice makes quite a difference. There are three kinds of juicers, masticating, twin gear juicers, and the centrifugal juicer. Both the formers are slow in performance which results in insignificant heat production.

On the other hand, centrifugal juicer possesses swift rotating blades which generate more heat and eventually lead to oxidation. According to this masticating juicer will hold a more lasting shelf-life


Steps for storage of juice

To maintain optimum shelf-life follow the following steps:

  • Eliminate oxidation and air touch.
  • Refrigerate it at very low temperature
  • Do not open and close the storage bottle/ frequently.


How do you know if fresh juice is bad?

If the juice shows some color change, growth of moulds or smell, the taste of the juice changes. The odour change may not happen but the taste would be enough to recognise that the juice has gone bad.


How do you preserve fruit juice for a year?


juice is good for you


After the process of juicing the fruits, the most important step is storage. But if you want to keep it for a prolonged period than adding some preservatives is important. One cannot juice every day, as it seems to be quite a tedious process.

To begin with, store the vegetable or fruit juice in a seal packed dark coloured container which will lessen the disclosure to light and oxygen. To keep it for a couple of months use the freezer to store the juices. In these ways, you can store the juices for as long as possible. To lengthen the shelf life, pasteurization is suggested.


Which juice is good for you?

As per the recent study of US national health library, scientists found that the most amount of fibre is present in Oranges. The intake of these fruits helps in a reduced risk of any heart ailment. The fruit is found effective against both a budding disease and a fatal one.

It is now suggested that high consumption of oranges significantly lower the occurrence and fatality of the disease.


Are juice diets healthy?

Juices are considered to be healthy breakfast options. But to your surprise, not only are packed juices inappropriate but the fresh juice is also not a healthy option.

For example, to prepare a glass of juice in the kitchen, you probably want to strain 4-5 fresh fruits. The calorie count of a glass of juice is more than the number of fruits used to make the juice. Also straining the juice gets rid of all the fibre and roughage and increases the sugar content.

Ripped fresh fruits contain a high amount of Vitamin C and flavonoids that are essential for the body. However fresh and packed juices lack these important minerals.

A glass of apple juice carries 120 calories and 1 fresh apple offers just 78 calories. Therefore, consuming fruits directly will always be a better option.


How long does fresh juice last in the fridge?


How Long Does Juice Last


As we’ve discussed earlier, the shelf life of a juice depends on the juicer type and completely airtight bottle.

The following table shows the storage time of fresh juice in a refrigerator as per the juicer used:

Juicer Shelf Life
Centrifugal 2-3 hours
Masticating 2-3 days
Twin gear 4-5 days


After the juice is prepared, immediately store it in a vacuum-sealed bottle before any bacteria get in. There are a few containers that can be used to store the juice properly

  • Glass bottles
  • Mason jars
  • Insulated Thermosteel bottles (for travelling purposes)
  • Stainless steel flasks
  • Glass jugs

Note: Do not use plastic containers to store juices they are not eco-friendly and will react with the juice, too.

Here are some bonus recipes for you that you might want to try in your home kitchen.

Immunity booster juice

Ingredients

  • 2 carrots
  • ½ inch peeled ginger
  • 1 peeled and deseeded orange

Juice for Glowing Skin

Ingredients

  • 1/2 beetroot
  • 1 orange
  • 1 carrot
  • 1 green apple
  • 1/2 cucumber
  • 1/2 celery stick

Detox Juice

Ingredients

  • Mint
  • An inch of ginger
  • Water
  • Lemon Slices(without seeds)
  • Chia seeds


Endnotes

You have to decide for yourself whether you drink fresh homemade juice or the packaged juice from the tetra pack. But even doctors suggest eating the wholesome fruit for better nutrition and roughage. Eating fruits would also help to avoid any bowel disorders like constipation. Keep a check on the daily intake of your juice and try to make it healthy!

With this, you can now decide how long your juice will stay proper in the fridge or outside.


https://brazenkitchen.com/how-long-does-juice-last/

Wednesday, May 12, 2021

The Best Choices For Cordless Blenders

The Best Choices For Cordless Blenders

Blenders are among one of the all-rounder kitchen appliances that are an inevitable part of the modern kitchen. As people and families become more and more health-conscious every passing day, kitchen equipment takes a more central role in the food-making process. A blender is an essential element in the making of everyday smoothies, shakes, soups, and even foods for babies. Needless to say, they play an important part in healthy cooking and eating.

But using the traditional wired blenders can sometimes be an issue. They need to be plugged in for electricity, which means you cannot carry them with you to parties, get-togethers, and picnics outdoors. It might also hinder your cooking in case of a power outage. A battery-powered, handheld version is a perfect answer for that.

With a battery-powered blender, you can guarantee your everyday dose of healthy food even if you are on vacation or out on a business trip. In this article, you can expect to find out about all the necessary things you need to know about this handy kitchen tool so that you can make an informed and wise purchase decision.


What Is A Battery Powered Blender?

A battery-powered blender is a portable kitchen device that runs on battery power instead of electricity. Because of their battery-run nature, these blenders are usually more compact and lightweight in build. That makes them more portable equipment and also easy to use in the kitchen.

It is a common misconception that battery-powered blenders are less effective than electrical ones. But in reality, that is not the case. You can use this device to make anything in the kitchen that you can make using an electrical blender – juices, sauces, drinks, pastes, mashes, and so on.

From making smooth and silky purees to mixing cocktails to blending cocktails – a battery-powered blender does it all. It is also super easy to operate, which is why it is everyone’s go-to tool for any kind of preparation – be it everyday staples or something experimental.


How Are Battery Powered Blenders Different From Countertop Blenders?

handheld blender

1.     Power Source

The power source is obviously the most prominent difference between battery-powered blenders and countertop blenders. The countertop blenders are wired and need to be connected to a plug socket to be functional. A battery-powered blender, on the other hand, works on battery. The battery storage can be internal or from an external source. In either case, the battery would have to be recharged when it runs out of charge.


2.     Portability

Battery-powered blenders are mostly small in size, more compact, and lightweight. They are designed to be portable by their very manufacturing. You can easily pack one up in your backpack, travel back, or picnic cooler, and carry it with you.


3.     Low Speed

A battery-powered blender functions at a lower speed than countertop blenders. The power of a battery creates lesser rotations per minute (RPMs) than electricity, hence this compromise. A battery-powered blender is therefore suitable for low to medium blending tasks in the kitchen. You can make perfect whisked cream, cake batter, potato mashes, and pumpkin purees, but when it comes to crushing ice or seedy fruits, it might have trouble.


4.     Simplicity Of Operation

A battery-powered blender is very simple to use. Countertop blenders often come with a variety of fittings and additional accessories, which can be hard to wrap your head around. There are no such problems with battery-powered blenders. They come in one piece mostly and can be easily operated with the flip of a switch and modulated with a knob.


Types Of Battery Powered Blenders

Battery-powered blenders can be divided into two broad sections.


·        Stand-Up Blender

Stand-up battery-powered blenders resemble traditional blenders in look and shape. They stand on a countertop with a wide base.

You have to hold the lid down, and the blender will get its job done inside the jar. This type usually has a greater battery power than the other one. You can use stand-up blenders to mash veggies and fruits, prepare smoothies, and make juices in large quantities.


·        Handheld Blender

Handheld battery-powered blenders, also known as immersion blenders, are smaller with lesser battery power. But they are more portable and easier to carry. They do not come with a jar but is a shaft with the motor inside and the blades at one end. You will have to hold the blender down into the container, ‘immerse’ it into food, and turn it on for blending.

They cannot blend harder objects like ice, fruit seeds, etc. These are best for food items, which are already soft and mushy. But some models come with replaceable rotor blades for different types of blends. You might experience pain or discomfort in your working hand if you use this blender for too long, especially if you have arthritis in your hand.


Things To Consider Before Buying A Battery Powered Blender

There are several factors that you should consider before deciding on the battery-powered blender you want to buy.

Immersion Blenders


·        Type Of Batteries

Before you buy a battery-powered blender, you must check the type of battery on which the appliance operates. They are mostly powered by two types of batteries – rechargeable and battery source. The immersion style usually has rechargeable batteries.

When they run out of power, you simply put the battery to charge and wait till it is powered back on. Alternatively, some brands provide an additional battery in case you have to use the device while the original battery is charging.

Stand-up blenders are usually plugged into an external battery source through an A/C adaptor. If you are outdoors and charging from the batteries of your van or your car, be careful not to drain them altogether. You would be stranded in the middle of nowhere with a functional blender, but with no car to get back home.


·        Duration Of Battery Charge

One of the very few drawbacks of battery-powered versions is the duration you can use them. On average, a battery-powered blender can hold charge for about 20-30 minutes, nor more than that. When you buy one, make sure the power charge duration is at least that much, and not less than that.


·        Type Of Blending Requirement

It all comes down to what you are going to use the blender for. If you need a blender for a quick blend of orange juice at the office or mixing a batch of margaritas at a house party, then any battery-powered blender is ideal for you. But they will fail you if you have to make a feast for 20 people. For this reason, most households have both the traditional blender as well as the battery-powered one to use as per the occasion.


·        Size And Weight

If you regularly carry your blender to your office or business trips or long drives out of the city, then a smaller and more compact blender would be ideal for you. People usually use handheld/immersive types for this purpose. They are usually in the range of 1.5 to 5 pounds weight, while stand-ups can weigh much more than that.


·        Wattage And Blades

The wattage determines the power with which it will blend. HigherHigher wattage means it can successfully blend solid objects like nuts or ice. But sometimes, even with lesser wattage, that can be accomplished if the blades are of excellent quality. You need to find one that has an accurate balance of both so that it meets all your requirements.


How To Clean Your Battery Powered Blender?


cleaning blenders


You need to pay as much attention to the cleaning of a battery-powered blender as any other appliance in the kitchen. The basics are simple enough. If it is a stand-up battery powered blender, then –

  • Fill the jar up with warm water after use.
  • Add a few drops of dishwashing liquid. Alternatively, you can also use vinegar or lemon juice for organic touch.
  • Let the solution rest for around half a minute.
  • Turn on the blender and run it for about 10-15 seconds.
  • Pour the dirty water out and rinse the jar clean with plain water.
  • Dry it out with a dishcloth and let it rest for the moisture to evaporate.

If it is a handheld battery-powered blender, you can simply wash the blades in a warm water solution and dry it up.

For deeper cleaning, you would have to disassemble the jars and blades and wipe them clean with a soft damp cloth.


Closing Thoughts

Whichever battery-powered blender you go with, make sure it is from a reputable brand and comes with at least 4-6 months warranty period. These blenders can definitely be used on a fairly regular basis and can last as long as 4-5 years, at least, but only when you do not overwork them and undertake regular cleaning after every use.


https://brazenkitchen.com/the-best-choices-for-cordless-blenders/

Wednesday, December 2, 2020

6 Quick and Creative Recipes to Make in a Food Processor

There are far more interesting things you can make with a food processor rather than beating egg whites for a sponge cake or grinding meat for lasagna bolognese.

Sure, it can chop, shred, slice, and grind. However, it also opens the door to many tasty recipes that can save you after a hard day at work, when the last thing you want to do is overwork yourself in the kitchen.

So, let’s see what you can do with a food processor that will make your kids forget about their “fast-food tantrum” and ask for home-made food!

Fire up the food processor, and let's get to work!

1. Broccoli Salad

Let’s start with our favorite crunchy and fresh Broccoli salad. The first emptied dish at potlucks and appetizer parties.

6 Quick and Creative Recipes to Make in a Food Processor
Print

Broccoli Salad

Equipment

  • Food Processor 

Ingredients

For the salad:

  • 4 cooked bacon slices
  • 2 cups small broccoli floret
  • 1 ½ cups small cauliflower florets
  • 1 cup brussels sprouts
  • 1 cup chopped carrot 
  • ½ cup red onion
  • 3 tablespoons sunflower seeds
  • ¼ cup dried cranberries
  • ¼ cup raw almonds
  • ¼ cup cheddar cheese

For the dressing:

  • ½ cup mayonnaise
  • ¼ cup plain greek yogurt
  • ½ teaspoon kosher salt
  • ½ teaspoon pepper
  • 2 tablespoons honey
  • 2 tablespoons apple cider vinegar

Instructions

  • Bring the large bowl of your food processor and add the cooked bacon, broccoli, cauliflower, sprouts, carrot, and onion.
  • Chop them several times until well combined.
  • Pour the mix in a bowl and set it aside.
  • Add all the dressing ingredients into another small bowl and stir till mixed well.
  • Add the shredded cheddar cheese along with the sunflower seed, cranberries, and almond to the main broccoli bowl and pour half of the dressing on top. 
  • Mix all the ingredients well, then toss the coat with the rest of the dressing.
  • Refrigerate for one hour then serve.

2. Ricotta Latkes

Time for a mouth watering Italian recipe. These delicate pancakes are the ideal choice for a very exciting breakfast or an afternoon tea-time treat when you’re in the mood for something light and sweet.

6 Quick and Creative Recipes to Make in a Food Processor
Print

Ricotta Latkes

Equipment

  • Food Processor 

Ingredients

  • 1 cup whole-milk ricotta cheese
  • 3/4 cup flour
  • 2 large eggs
  • 2 tbsp granulated white sugar
  • ¾ teaspoon kosher salt
  • ½ teaspoon baking powder
  • 1/4 teaspoon baking soda
  • Non-stick cooking oil spray

Instructions

  • Pulse all the ingredients except the cooking oil in a food processor for two minutes, and stop every now and then to scrape down the sides as needed. Bring it out when it’s completely smooth.
  • Spray a frying pan with non-stick cooking oil spray, then heat it to 350 degrees. 
  • Drop two tablespoons of the batter on the frying pan for each pancake and spread it to form a thin circle. 
  • Cook each side for 2-3 minutes until it’s slightly browned.
  • Repeat for the rest of the batter.
  • If you find it’s darkening quickly, reduce the heat.
  • Serve it immediately with honey or jam topping.

3. Turkey Meatballs

These protein powerhouses can be the best way to serve your kids a super yummy dish. And using your food processor, they’re going to be super quick too. 

6 Quick and Creative Recipes to Make in a Food Processor
Print

Turkey Meatballs

Equipment

  • Food Processor 

Ingredients

  • 2 pounds ground turkey
  • One cup whole-wheat bread slices
  • ⅔ cup minced onion
  • ½ cup minced parsley
  • Two large eggs
  • 3 garlic cloves
  • ½ tablespoon dried oregano
  • 1 teaspoon salt
  • ½ teaspoon pepper
  • ½ cup olive oil
  • ½ teaspoon basil
  • Barbecue sauce
  • Non-stick spray oil

Instructions

  • Preheat the oven to 400 degrees.
  • Chop the bread slices in the food processor until crumbs form then transfer into a large bowl.
  • Add the meat along with the parsley, eggs, oregano, olive oil, salt, and pepper. Then pulse to blend.
  • Add the meat along with the parsley, eggs, oregano, olive oil, salt, and pepper. Then pulse to blend.
  • Coat the rack with non-stick spray oil.
  • Shape the mix into medium-sized balls then arrange them on the rack.
  • Bake for 15-20 minutes until their edges become crispy and slightly browned.

4. Chocolate Avocado Pudding

Time for a healthy and sweet afternoon snack or New year’s get-together. To make chocolate avocado pudding, you only need a few ingredients and your magical food processor.

6 Quick and Creative Recipes to Make in a Food Processor
Print

Chocolate Avocado Pudding

Equipment

  • Food Processor 

Ingredients

  • 2 large avocados
  • 3 tablespoons unsweetened cocoa powder
  • ½ cup melted chocolate
  • 1 teaspoon vanilla extract
  • ¼ cup coconut milk
  • 2 tablespoons maple syrup
  • 1 pinch salt

Instructions

  • Blend all the ingredients in the processor until they become smooth.
  • Scrape down the sides to ensure a good blend.
  • Refrigerate for 30 minutes then serve chilled.

5. Basil and Parsley Pesto

Make your beloved pesto in just a few steps with a food processor and serve it with sandwiches, pasta, or Italian-style soup.

6 Quick and Creative Recipes to Make in a Food Processor
Print

Basil and Parsley Pesto

Equipment

  • Food Processor 

Ingredients

  • 2 cups packed basil leaves
  • 1 cup packed Italian parsley
  • 2 garlic cloves
  • 4 teaspoons lemon zest
  • 1/4 cup toasted slivered almonds
  • 1/3 cup lemon juice
  • 2 tablespoons honey
  • 1/2 cup olive oil
  • 1/2 cup Parmesan cheese
  • 1/2 teaspoon salt

Instructions

  • Chop basil along with parsley, garlic, and almonds in a food processor.
  • Add honey, salt, lemon zest, and juice then blend the mix together until a paste starts forming. 
  • Add oil gradually and continue to crush until a creamy paste has formed.
  • Add the Parmesan cheese and blend again till the paste comes together.
  • Store in the refrigerator.

6. Sweet Shortcrust Pastry

This sweet shortcrust pastry, aka sweet pie crust, only takes a few minutes to make. It will guarantee that you have enough stock to shell your favorite apple pie or melt-in-the-mouth lemon meringue that melts in the mouth.

6 Quick and Creative Recipes to Make in a Food Processor
Print

Sweet Shortcrust Pastry

Equipment

  • Food Processor 

Ingredients

  • 1 ½ cups plain flour
  • 125-gram chilled unsalted butter
  • 1 ½ tablespoon chilled water
  • ¼ cup pure icing sugar 

Instructions

  • Add the flour, cold butter, and sugar into the processor’s bowl and pulse several times until the mixture looks like breadcrumbs.
  • Add chilled water and process until the dough becomes more firm.
  • Bring the dough out and knead it a few more minutes, then shape it into a disc.
  • Let it rest in the freezer for 20 minutes or in the refrigerator for 1 hour.

Final Thoughts

Among the ways we like to use our food processor, these are the best recipes that have made it to our recipe book. Tell us about your favorite food processor recipes as well.

Enjoy and Bon Appetit!


https://brazenkitchen.com/6-quick-recipes-to-make-in-a-food-processor/